Thursday, February 16, 2012

Assignment

The assignment is to do a walk cycle and jumping from a box. This of course includes the weight shift, balance and stuff. For this assignment, I can only say that my flaw in timing made my walk cycle a poor animation. I have tried to edit it in the graph editor, the motion trail and editing it by straight ahead but the result is still poor. I had no choice but to continue on with my jump. For my jump, I am happy to say that my jumping is quite decent as I image a person from the jumping pose to the midair pose to the landing pose and I ended up with my jump animation.

References:


My walk cycle:


My jump animation:

Animation

Animation requires weight shift, balance and stuff like ease in ease out, anticipation and many more. To me, animation is way easier than rigging and its more interesting as I see results. I learned how to see the weight shift and animate it to look like it has balance. This is crucial to me as it is the basics of basics. Then I added anticipation to make it more realistic and interesting. Honestly, I have nothing to type about animation as it is the experience that I have and not a bunch of words to describe it.
This is my animation of spiderman weight shift.


This is my bigdog animation.


My flaw in animation is my timing. I am unable to have a firm foundation for timing and this makes my animation ulgy. This can only come with more practice!

Rigging

Rigging is a very tedious, tough and complex process. It requires the knowledge of human anatomy, knowledge of the limits of adjustments for each part of the body and knowledge of the different tools in Maya to acheive a basic rig.

Knowledge of the placement of basic joints to form the skeleton. As it should be simple and not as complex as the real human skeleton, Major areas where joints are needed to be able to move the model are placed in this exercise. I learned where the major areas are and also learned that the foot has three parts. I learned that different constraints are applied to different parts of the body to achieve the effect of what natural constraints the human body have. I also learned about the different solvers like RPSolver and SCSolver. I have to admit that I will avoid rigging in the future if possible as it is not only tedious but mundane.

My 3 poses:


I intended to have a kneeling pose but it was not possible with the rig I made. The fingers are also not very bendable as the polygons will be messed up if I try to bend it to the maximum. Overall, this rig is a basic showcase of rigging and rigging scares me quite abit but the knowledge of the body and the different tools is quite an experience.

Tuesday, January 24, 2012

Pose - ElevenRig

Pose 1
Reference image for pose 1.
Final pose for pose 1.

For this pose, I started with the legs. It was not easy to cross the legs as when I tried to position it the way the picture shows it, the legs go through each other. Next I move on to the arms and hands. I rescaled the hands as the hands were too big and tried to position them but as the arms were too short and I could not bend the model's back too much as it would look unnatural, The arms did not rest on the thighs. Then I moved on to the head. Tilting the head is easy but adjusting the eyes is too hard as if I attempt to adjust the eyes like the picture, it will be deformed and it will not attain the eye shape in the picture. I adjusted the lips and jaws to produce a natural smile. I think this pose is a decent job as this rig gives multiple options like adjusting the eyes.

Pose 2
 Reference image for pose 2.
 Final pose for pose 2.

I found this pose tough as I was unclear about the upper part of the body. I started with the legs as it was easy. I went on to do the body, arms and hands. The position of the upper body was difficult to get and my teacher helped me by adjusting the back and the hands, commenting that making it look natural and nicer is better than strictly following the picture. I also had a hard time attaing the position of the head as I tilted the head in different angles but cannot seem to get the feel the picture is showing but in the end I managed to get a acceptable angle. I tried to make the eyes like the model in the picture but the rig has limitations so I ended up with the one in the rig. I personally like the expression of the model for this pose and I also like the expression I have adjusted for the rig.

Pose 3
 Reference image for pose 3.
Final pose for pose 3.

For this pose, it looks quite tough and again, I started with the legs. I had trouble with the back as my teacher asked me where the weight is leaning to and I got it wrong. It took me a few tries to get this posture but it still feels like the weight is not totally correct. Overall I think the position of the legs were done well but the upper part of the body needs more improvement.

Pose - Spiderman

Pose 1
This is the reference image for the first pose.
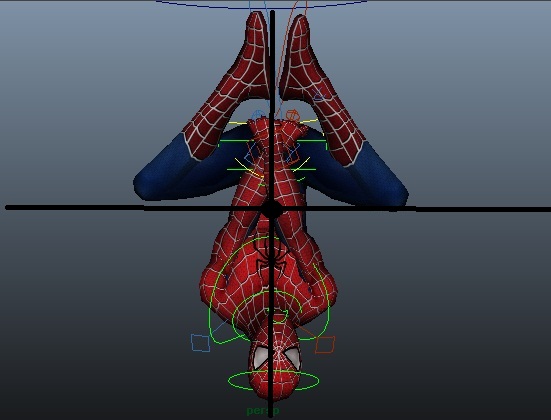
This is the front view of my final pose.
This is the side view of my final pose.
This is the center of gravity of the pose.

I had trouble getting a refined shape for the back and required multiple tries and comments from the teacher to acheive the shape in the picture. At the start, I had trouble with the user interface of the rig but after a few hours and some guidance from my classmates, I managed to understand the rig and use it with ease. Firstly, I concentrated on getting the fundamental pose by adjusting the back and legs. After attaining a decent posture, I concentrated on the arms and hands. Then I refined the posture and position of the arms and hands. One thing I could not get it right was the arms. The arms always look twisted and unnatural. That is a flaw in the final pose. I also learned that its is not a must to follow exactly what the picture shows but adjust it to make it look natural and bring out the intended feel. I also learned that I must consider if the posture and position is right. If the center of gravity is off, the pose is ruined.

Pose 2
This is the reference image of my second pose.
 This is the final pose for my second pose.

For this pose, I did it quite smoothly except for the head which is not in the position the reference image shows and I could not figure out how to position the head in that manner. Other than that, this pose is decent and it captures the basic pose.

Pose 3
The figurine at the right is the reference image for the third pose.
The final pose for the third pose.

Again, like the second pose, this pose captures the basic pose but the head is not in the same position as the reference image. I have pondered over it for some time but for now I'll leave it as it is.

Overall, I think the poses are pretty decent but there is room for improvement.

Tuesday, January 17, 2012

Cow


This is the cow that I've modeled. For a few 3DVA works including this, I failed to take screenshots while I was doing it as I have a habit to finish what I am doing and I dislike incompleted work. I apologise for this and in the future I will take screnshots while I'm doing my work.

Being able to attain such a nice head is due to the step by step video provided. Without the video, my model's head most likely will not turn out this nice. The guided process was detailed and informative, reveaking things that did not cross my mind when I model. Although there isn't a video for the modeling of the body, the teacher gave me advices like how to make the feet, legs, body and hands look realistic, I managed to come up with this body. Though it may not be the best, but I've learned and recapped many points when modeling the cow. Topology is very important to creating a good model. Simply adjusting the vertex, edge and faces can produce different results. Adding edge loops makes the edge flow smoother and greatly improves the topology of the model.

The guidance from the teacher and through modeling this cow, I also realised that it is important to consider the anatomy of creatures and humans. Knowing how it looks like, how much it is able to bend in a certain direction and the list goes on. This understanding will result in a model that look and move naturally. Knowing how to image the topology of the thing that will be modeled is also a good skill to possess as it breaks down the thing and provides an idea on how to go about making it.

Points that I've learned/recapped for Maya are: Mirror geometry helps you join the vertices which proves to be a better tool than duplicate depending on the situation.
Extruding and adjusting different elements like faces and edges produces different results which provides many different options.
Pressing insert button allows you to adjust the pivot which affects adjusting factors like rotation. Different pivot positions produce different rotation results. 
Using the merge vertex tools have different results depending on which vertex you select first.
Not advisable to use convert polygons to subdiv as faces cannot be deleted in subdiv. 

Sunday, August 21, 2011

Reflection for Project 2


My animation has many flaws and I would say that it is 70% successful. I failed to do my slow-in and out at the part where the robot spins smoothly and the result was not smooth and a different effect from what I wanted. I think I did not apply many animation principles to make it a good animation clip like anticipation and my stretch for the robot magnet when the robot was spinning was not visible as the robot was spinning too fast and the effect is easily missed when watching the video. I also failed to hide the arm control even though I break connection for the visibility as if I hide it the cargo box I parent to it will be invisible all the time. I am able to get mainly what I wanted except for the slow-in and out mentioned earlier.